

SECR
Waiting for the train… Take 2.

Starting early?
In a month or so Herstmonceux will be at Railex so it’s time for me to start getting it ready. Now some of you might be thinking that it’s a bit early to start preparing for the show but Herstmonceux hasn’t been out since Exeter last July and could do with a bit of a freshen up. A few new trees need making and planting, some of the other vegetation could do with some work and the whole layout could do with a good clean.

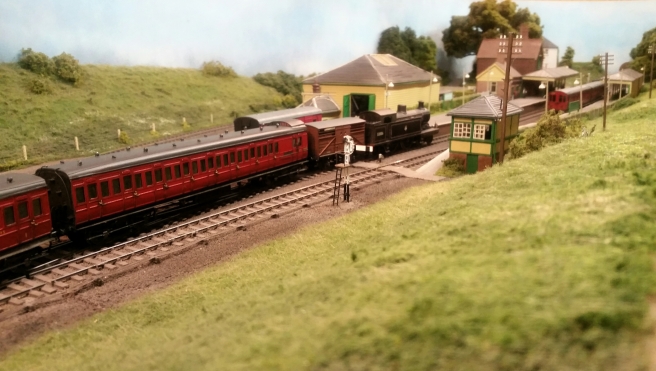
I have also been working on some items of stock. The I3 has been on the list of needing fixing for a while. Turns out the motor mount had broken so this was fixed and some tidying up of the weathering. My Std 4mt 2-6-0 had had its motor and gearbox pinched when I built my last K Class so this has been replaced. The Birdcage set and the LBSCR Pull-Push set still needed floors adding and a spot of weathering after being used at Exeter. Something else I wanted to do was go through my wagons and sort out some of the weathering on them. A lot of my wagons had had a quick job done on them so they were usable on Herstmonceux and I thought it was about time I gave them a better going over.


There is still plenty more to be done. The D3 is getting a new motor and High Level gearbox plus a pile of new wagons need finishing off. Should be a busy month or so.
Cream Tea anyone?
In just under 2 weeks Herstmonceux will be heading down to Devon for the Exe Model Railway Society show. Although I have been focused on getting Tarring Neville finished I have also been working on a few new things for Herstmonceux which will hopefully ready for the show.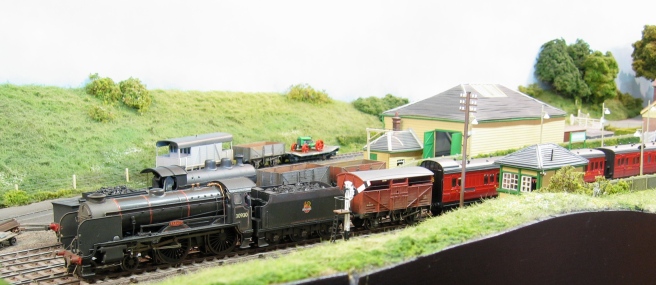
For a while now my Birdcage set has been 2/3s finished and when run at a couple of shows its pinched the composite coach from the SECR Pull-Push set. I finally got the sets composite built and its currently waiting on some transfers and then the whole set needs weathering.
Something else that has been on the “to do” list is another Pull-Push set. Last year I received a new Cuckoo line book and I mentioned that one picture was very interesting. This picture showed a ex-LBSCR Pull-Push set and a D3 tank at Hailsham. The D3 turned out to be the one that I have modelled..
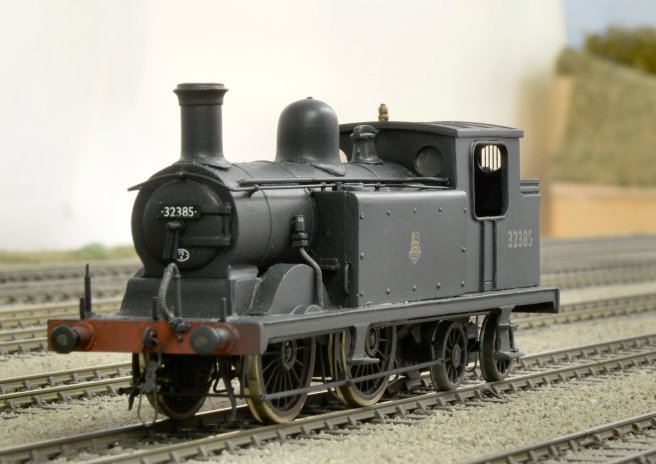
Being at Hailsham it puts it very close to Herstmonceux and the possibility that it might of turned up on the Ouse valley line… So luckily for me that nice guy Mr Roxey produces a kit of the LBSCR Pull-Push set. This is also just waiting on some transfers and some weathering and I will stick some pictures up when it’s finished.
With these two new sets a new timetable was needed to fit them in so hopefully I’ll get this finished ready for Exeter. Chris has also worked on a rake on mineral wagons to run in the new timetable as a diverted Kent coal train and I have tried to fit in a few more unusual workings that would of been seen in the area.
Bringing Up the Rear
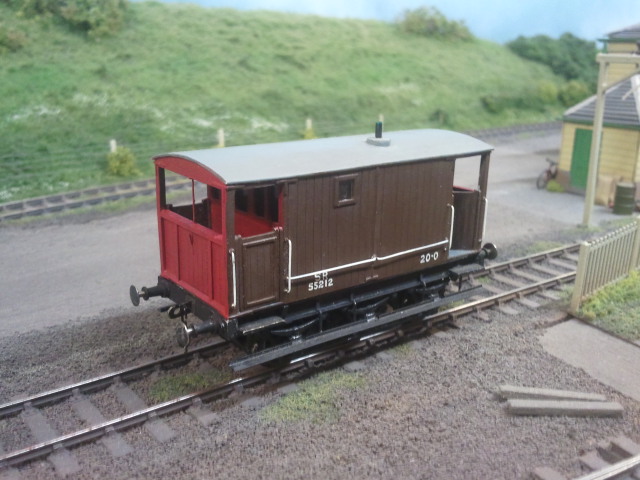
This post has come about for 2 reasons. The main reason is the brake van pictured above and the other I’ll get to later.
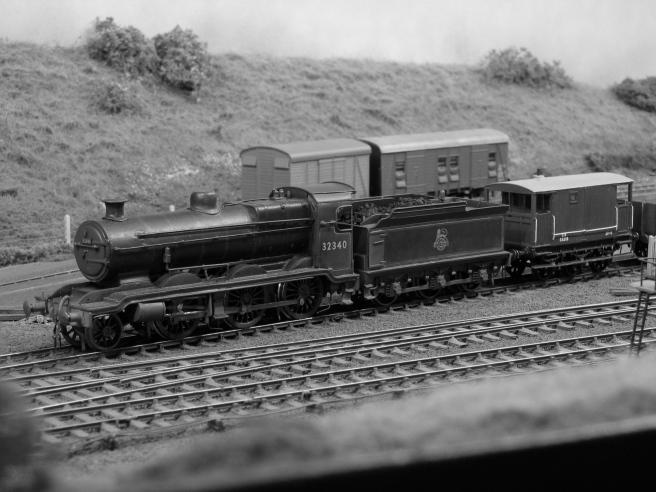
Now the brake van pictured above is a SECR 20t 6 wheeled goods brake van diagram 1558. 40 were built in 1898 that had one open and one enclosed balcony. These were later rebuilt and had different framing on each end compared to the 50 later 1910 design that had two enclosed ends from new. Most passed into BR ownership but were withdrawn between 1949 and 1960. One has survived and is based at the KESR.
The model I have was picked up cheap at the Manchester show in December and I originally thought it was a Falcon Brassworks kit going by the weight of it. It wasn’t until I got it home and was trying to take the EM gauge wheels out to replace that I found out otherwise! As the second set of wheels came out the body came off in my hand. To my surprise the body was made of plasticard with the underframe made of brass with each axle sprung and sprung buffers. Who ever scratchbuilt it did a cracking job and going by the box it came in its pretty old. All I have done to it is put it back together with a set of OO wheels and repainted the ends. It runs real well and that’s probably down to the amount of weight in it and sprung axles.
The other reason for this entry was a post I picked up on during the usual frothfest before the Bachmann announcement at the begin of the month. The poster was hoping for a SECR Dance hall brake van to be produced RTR. What is this new trend of people waiting around for RTR stuff??
And if people really really wanted one of these brake vans then there are already options. For starters you have the Cambrian plastic kit which isn’t hard to build. If you really want to push the boat out you can go for the London Road Models brass kit. I have built 3 Dance hall brake vans, 2 are Cambrian kits built as different examples and the other is old 51L brass kit (the one on the left below). 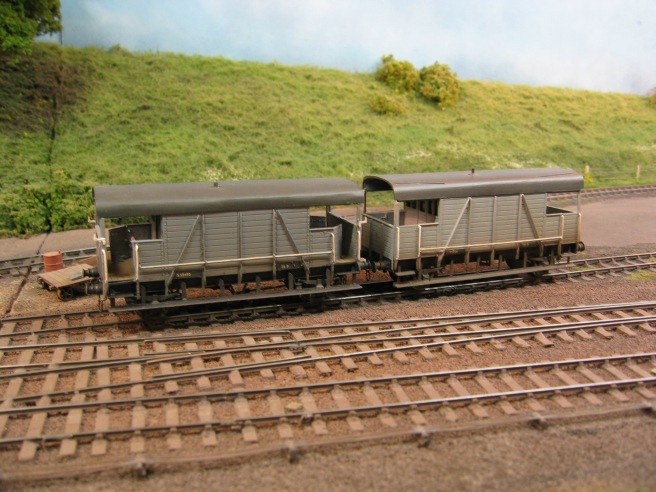
I haven’t got anything against people wanting stuff produced RTR, most of my other brake vans are modified RTR but without the kit built vans there would be less variety on my layout and I would of built more kits if the RTR models weren’t available. Some of the other brake vans I have include 3 SR25t Pill-box vans. 1 is a Cambrian kit and the other 2 are Bachmann.

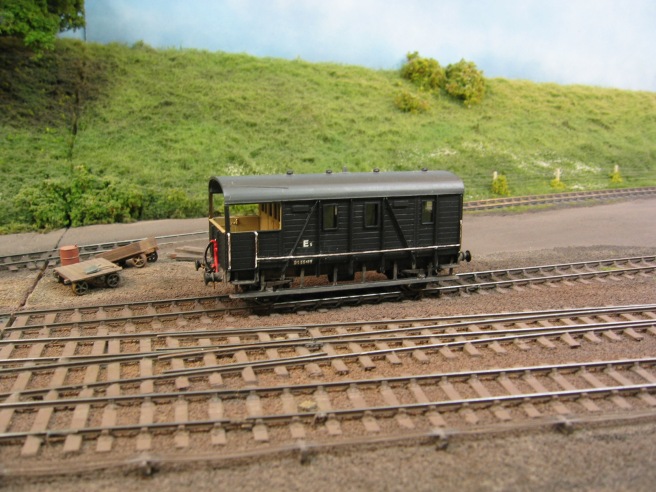
There is also a detailed Hornby LBSCR 20t brake van which I am hoping to do another of soon.
I have a Queen Mary brake van as well but don’t tend to use it much at shows and I must get round to building a Marc models SECR 20t Ballast plough brake van to the engineers rake. There are also a couple of BR and a LMS brake van just to mix it up a little.
So back to the guy wanting a RTR Dance Hall brake van. The usual retort on forums from those wanting everything RTR when asked why they don’t try a kit is they can’t, don’t have the skills, don’t have the time etc. Well I would argue that the 10-15 minutes spent frothing and wishing on forums could be spent trying to build a kit and gaining the skills needed. That brings the argument down to can’t and as my Nan always said “there is no such word as can’t”. I usually stop reading after that because its all been said before. The name calling starts with words like elitist, rivet counter and finescale being thrown around. Once the word finescale is said the media experts start mocking from afar although they are only too happy for everyone to buy what ever magazine they might be in this month when it suits. Its all rather tiresome and usual ends up with someone saying they were “only joking” to try and save face. 
Anyway I think I’ll stick to building kits instead of waiting around. Its usually quicker and adds more variety. Variety is important to me and with Herstmonceux I’ve tried to model a area and era with the stock to match and part of it is to be different to make it interesting, not only for me but for people that see the layout at shows. I could fill the layout with all the latest RTR items, but the layout wouldn’t be the same and in my opinion it would lose its character and essence.
More Birdcages
I was asked by Steve Carter how I do the roofs on the Birdcage coaches and the honest answer is… as best I can. I follow the instructions as much as possible but no two are the same and a lot of filling, sanding and swearing ensues.
The main problem area I find is trying to cut the excess off to get a good fit and its usually better to leave a little more than is need and trim/sand it down after gluing. I don’t put a floor in the coaches like it says in the instructions but opt for adding a floor on the underside of the underframe. The reason for this is so that you can get inside still to add some extra glue if needed. Also you don’t end up with bits inside when you drill holes for the roof vents. For the birdcage end I cut the roof square with the front of the window and added the two strips down the side after. Hopefully these pictures will explain what I mean better.


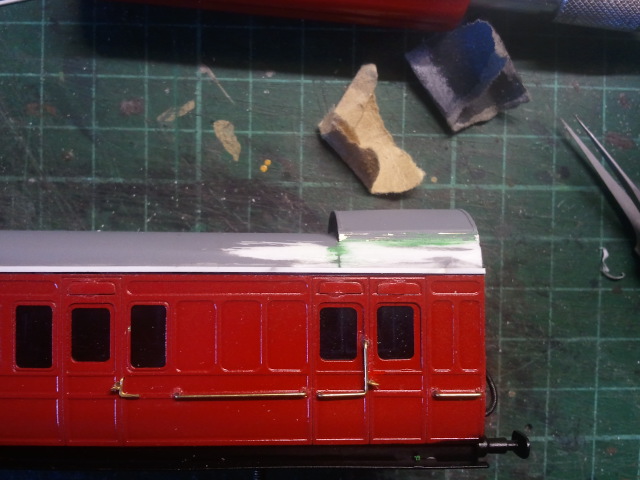
The other thing you might notice is the microstrip on the lower edge of the roof. This serves two purposes. One, it fills the slight gap when your roof doesn’t quite fit! Two, its there on the prototype. Sometimes it can go very wrong and I have to use a slightly bigger bit of microstrip to fill the gap which I then trim and sand down before adding the smaller microstrip on top. I will try and post another update on these in the next few days as they are nearing finishing.
